
As more sensitive business data lands in Microsoft 365—client contracts, HR documents, financial reports—the risk of data leakage grows with it. Microsoft’s built-in sharing and collaboration features are powerful, but they’re also easy to misuse.
Microsoft Purview Information Protection helps you apply consistent classification, labeling, and protection to that data. But implementing it properly requires more than just enabling labels—it’s about understanding the data landscape, using automation wisely, and closing the loop with monitoring and control.
This post walks through how Purview’s labeling system works, common pitfalls, and how to take things further with classification, encryption, and data loss prevention.

What Is Microsoft Purview Information Protection?
Microsoft Purview Information Protection (MPIP) is the modern evolution of Azure Information Protection. It provides tools to:
Classify content based on sensitivity.
Label files and emails with encryption, visual markings, and usage restrictions.
Automatically identify and protect sensitive data using built-in patterns or trained models.
Monitor how that content is used across Microsoft 365.
It’s all managed through the Microsoft Purview compliance portal, alongside DLP, records management, Insider Risk, and more.
Sensitivity Labels: Still the Core
Sensitivity labels are the foundation of Information Protection in Purview. But it’s easy to stop there and assume labeling alone equals protection. It doesn’t.
Label Capabilities
A sensitivity label can:
Apply encryption tied to Microsoft Entra ID identities (formerly Azure AD).
Restrict actions like forwarding, printing, or copying.
Add visual markings like headers, footers, and watermarks.
Travel with the file, even if it’s downloaded or emailed outside your org.
Example: A label like “Confidential – Finance Only” might encrypt files so only members of the Finance group can open them, while adding a header and watermark to every page.
Label Policies
Creating a label isn’t enough. Labels must be published through label policies. These control:
Which users can see and apply labels
Whether labeling is required
Default labels for new files or emails
Without policies, labels won’t appear in Office apps at all.
Auto-Labeling
Auto-labeling applies labels based on:
Sensitive information types (e.g., SSNs, credit cards)
File location (e.g., HR SharePoint site)
Trainable classifiers (patterns based on example content)
Auto-labeling reduces human error and closes gaps that come from relying on users to classify content manually.
Common Pitfalls

Even with labels in place, we often see the following mistakes:
Labels created but not published – Policies are never configured, so labels go unused.
Encryption misapplied – Broad access (like “All Authenticated Users”) defeats the purpose.
Manual labeling dependency – If you don’t require labeling, users will skip it.
No testing or pilot group – Labels get applied org-wide with no validation.
Assuming coverage is consistent across platforms – Auto-labeling is limited on macOS and mobile.
Real-World Case: Securing HR Data in OneDrive
One client had migrated fully to Microsoft 365 but hadn’t deployed any labeling. HR documents, including files with SSNs, were stored in personal OneDrive folders with no tracking or restrictions.
We helped them:
Audit their data locations using Content Explorer.
Define a label taxonomy based on business roles and data types.
Deploy pilot label policies with mandatory use for HR.
Enable auto-labeling based on sensitive information types.
Review usage via Activity Explorer and tune the policies.
In 45 days, they had full visibility into their sensitive data footprint and applied consistent controls across over 80% of their high-risk files.
Know Your Data
You can’t protect what you can’t see. Purview offers foundational discovery tools to map out your data landscape.
Sensitive Information Types
Prebuilt patterns detect common data types (e.g., credit cards, health records, financial data). You can also define your own using regular expressions and proximity rules.
Trainable Classifiers
Trainable classifiers learn from example documents instead of regex. They’re ideal for detecting patterns like résumés, contracts, or HR evaluations that don’t follow a fixed format.
Content and Activity Explorer
Content Explorer shows what’s been labeled and where.
Activity Explorer reveals how labeled content is being shared, modified, or downloaded.
Use these tools to validate your rollout and refine your policies over time.
Protect Your Data
Labels aren’t the only line of defense. Purview includes tools to apply encryption, control access, and secure data across apps and locations.
Message Encryption
Encrypts email messages (and attachments) so only the intended recipient can read them — even outside your organization.
Double Key Encryption
Meets strict regulatory demands by allowing you to hold the second key, ensuring Microsoft can’t access the content under any circumstances.
Information Protection Scanner
Scans on-premises file shares and servers for sensitive content. Automatically labels or encrypts what it finds.
Defender for Cloud Apps Integration
Enables real-time policy enforcement for labeled files across third-party cloud services — like blocking downloads from unmanaged devices.
Microsoft Purview Data Map
Allows labeling at scale in Azure Data Lake, SQL, Cosmos DB, and other structured data sources.
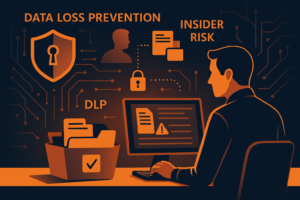
Prevent Data Loss
Once content is labeled and protected, you still need to control how users interact with it — especially when data is shared, copied, or moved.
Microsoft Purview DLP
Applies policies across:
Exchange Online – Block emails with sensitive content
SharePoint and OneDrive – Prevent sharing outside the org
Teams – Block messages with confidential info in chat and channels
Endpoint DLP
Extends protection to actions taken on the device itself, including:
Copy/paste
Printing
Saving to USB
DLP for Chrome and On-Prem Repositories
Chrome Extension: Extends DLP to browser-based actions.
On-prem DLP: Monitors file activities on legacy file shares and SharePoint Server.
PowerShell Example: Auditing Label Usage
Want to check how labels are actually being used in your environment? This PowerShell example shows how to connect to Exchange Online and query message traces with applied labels: